

Italian (Italiano) translation by Francesco (you can also view the original English article)
Per il tutorial + screencast di questa settimana, vi insegneremo come creare il vostro carrello elettronico con PHP e MySQL. Come vedrai, non è così difficile come potresti pensare.
Screencast preview
Step 1
Iniziamo dando uno sguardo alla struttura della cartella:

Struttura
- reset.css - potete scaricare il file reset da questo link
- style.css - il nostro file css che useremo per stilizzare il nostro markup HTML
- connection.php - il file che creerà la connessione al database
- index.php - il template per il nostro carrello
- cart.php - il file in cui potremo cambiare i prodotti del carrello (aggiungere, rimuovere)
- products.php - pagina di elenco dei prodotti
Step 2
Inizieremo scrivendo il markup html e dopo applicheremo lo stile. Quindi apriamo il file index.php e copiamo/incolliamo il codice seguente:
1 |
|
2 |
<!DOCTYPE html PUBLIC "-//W3C//DTD XHTML 1.0 Strict//EN"
|
3 |
"http://www.w3.org/TR/xhtml1/DTD/xhtml1-strict.dtd">
|
4 |
|
5 |
<html xmlns="http://www.w3.org/1999/xhtml"> |
6 |
<head>
|
7 |
|
8 |
<meta http-equiv="Content-Type" content="text/html; charset=utf-8" /> |
9 |
<link rel="stylesheet" href="css/reset.css" /> |
10 |
<link rel="stylesheet" href="css/style.css" /> |
11 |
|
12 |
<title>Shopping cart</title> |
13 |
|
14 |
</head>
|
15 |
|
16 |
<body>
|
17 |
|
18 |
<div id="container"> |
19 |
|
20 |
<div id="main"> |
21 |
|
22 |
</div><!--end main--> |
23 |
|
24 |
<div id="sidebar"> |
25 |
|
26 |
</div><!--end sidebar--> |
27 |
|
28 |
</div><!--end container--> |
29 |
|
30 |
</body>
|
31 |
</html>
|
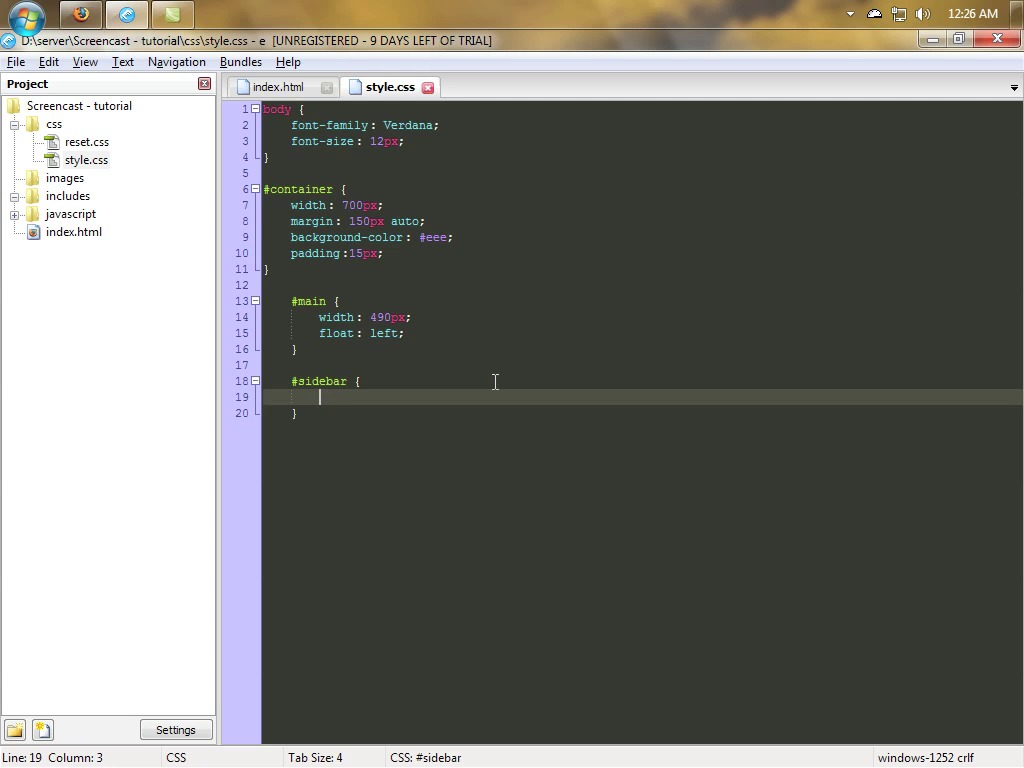
Come potete vedere, la nostra pagina ha due colonne: la colonna principale e la sidebar. Vediamo il CSS. Aprite il file style.css e scrivete il codice sottostante:
1 |
|
2 |
|
3 |
body { |
4 |
font-family: Verdana; |
5 |
font-size: 12px; |
6 |
color: #444; |
7 |
}
|
8 |
|
9 |
|
10 |
#container { |
11 |
width: 700px; |
12 |
margin: 150px auto; |
13 |
background-color: #eee; |
14 |
overflow: hidden; /* Set overflow: hidden to clear the floats on #main and #sidebar */ |
15 |
padding: 15px; |
16 |
}
|
17 |
|
18 |
#main { |
19 |
width: 490px; |
20 |
float: left; |
21 |
}
|
22 |
|
23 |
#sidebar { |
24 |
width: 200px; |
25 |
float: left; |
26 |
}
|
Ecco come dovrebbe apparire la nostra pagina prodotti:

Screencast completo
Step 3
Prima di andare avanti sulla parte PHP/MySQL, dobbiamo creare il database. Aprite phpMyadmin e seguite questi passi:
- Andate sulla tab Privilegi, cliccate il bottone aggiungi nuovo utente e usate le seguenti impostazioni: Username: tutorial; Host: localhost; Password: supersecretpassword. Ora assicuratevi che sono stati assegnati i privilegi globali; poi andate al passo successivo.
- Create un nuovo database chiamato tutorials.
- Create una nuova tabella chiamata products e impostate il numero di campi a 4. Ora popolate questi campi con questi valori: id_integer - assicuratevi che non sia impostato su INT e spuntate la casella PRIMARY(imposta anche auto_increment): name - imposta VARCHAR con una lunghezza di 100; description - VARCHAR con lunghezza 250; price - assicurati che sia impostato su DECIMAL(2,6)
- Popolate il database con dei prodotti di esempio
Per risparmiare tempo, ho esportato la mia tabella prodotti così potete semplicemente eseguire la seguente query:
1 |
|
2 |
CREATE TABLE IF NOT EXISTS `products` ( |
3 |
`id_product` int(11) NOT NULL AUTO_INCREMENT, |
4 |
`name` varchar(100) NOT NULL, |
5 |
`description` varchar(250) NOT NULL, |
6 |
`price` decimal(6,2) NOT NULL, |
7 |
PRIMARY KEY (`id_product`) |
8 |
) ENGINE=MyISAM DEFAULT CHARSET=latin1 AUTO_INCREMENT=7 ; |
9 |
|
10 |
INSERT INTO `products` (`id_product`, `name`, `description`, `price`) VALUES |
11 |
(1, 'Product 1', 'Some random description', '15.00'), |
12 |
(2, 'Product 2', 'Some random description', '20.00'), |
13 |
(3, 'Product 3', 'Some random description', '50.00'), |
14 |
(4, 'Product 4', 'Some random description', '55.00'), |
15 |
(5, 'Product 5', 'Some random description', '54.00'), |
16 |
(6, 'Product 6', 'Some random description', '34.00'); |


Step 4
Prima di estrarre i dati dal database, creerò il file index.php come template per la lista dei prodotti e il carrello. Quindi aggiungi il seguente codice all'inizio del file index.php:
1 |
|
2 |
<?php
|
3 |
session_start(); |
4 |
require("includes/connection.php"); |
5 |
if(isset($_GET['page'])){ |
6 |
|
7 |
$pages=array("products", "cart"); |
8 |
|
9 |
if(in_array($_GET['page'], $pages)) { |
10 |
|
11 |
$_page=$_GET['page']; |
12 |
|
13 |
}else{ |
14 |
|
15 |
$_page="products"; |
16 |
|
17 |
}
|
18 |
|
19 |
}else{ |
20 |
|
21 |
$_page="products"; |
22 |
|
23 |
}
|
24 |
?>
|
- session_start() - questo verrà usato dopo; ci permetterà di usare le sessioni (è di vitale importanza che session_start sia chiamato prima che gli altri dati sono inviati al browser).
- Nella seconda linea, includiamo connection.php che creerà la connessione al database (affronteremo questo tra poco). Un'altra cosa: la differenza tra include e require è che se usi require e il file non viene trovato, l'esecuzione dello script si fermerà. Se usiamo "include", lo script continuerà a funzionare.
- Invece di copiare il codice html intero (il link per il css, per il js) per ogni file nel vostro sito, si potrebbe solo renderli relativi in un singolo file. Quindi per prima cosa, controllerò se c'è una variabile GET chiamata "page set". In caso negativo, creerò una nuova variabile chiamata _pages. Se la variabile GET pages è impostata prima, vorrò essere sicuro che il file che sto andando ad includere è una pagina valida.
Per far funzionare tutto questo, abbiamo bisogno di includere il file; aggiungiamo questa linea al file index.php tra il div con id "main".
1 |
|
2 |
<?php require($_page.".php"); ?> |
Ecco il file index.php completo che avremo:
1 |
|
2 |
<?php
|
3 |
session_start(); |
4 |
require("includes/connection.php"); |
5 |
if(isset($_GET['page'])){ |
6 |
|
7 |
$pages=array("products", "cart"); |
8 |
|
9 |
if(in_array($_GET['page'], $pages)) { |
10 |
|
11 |
$_page=$_GET['page']; |
12 |
|
13 |
}else{ |
14 |
|
15 |
$_page="products"; |
16 |
|
17 |
}
|
18 |
|
19 |
}else{ |
20 |
|
21 |
$_page="products"; |
22 |
|
23 |
}
|
24 |
|
25 |
?>
|
26 |
<!DOCTYPE html PUBLIC "-//W3C//DTD XHTML 1.0 Transitional//EN" "http://www.w3.org/TR/xhtml1/DTD/xhtml1-transitional.dtd">
|
27 |
<html xmlns="http://www.w3.org/1999/xhtml"> |
28 |
<head>
|
29 |
|
30 |
<meta http-equiv="Content-Type" content="text/html; charset=utf-8" /> |
31 |
<link rel="stylesheet" href="css/reset.css" /> |
32 |
<link rel="stylesheet" href="css/style.css" /> |
33 |
|
34 |
|
35 |
<title>Shopping Cart</title> |
36 |
|
37 |
|
38 |
</head>
|
39 |
|
40 |
<body>
|
41 |
|
42 |
<div id="container"> |
43 |
|
44 |
<div id="main"> |
45 |
|
46 |
<?php require($_page.".php"); ?> |
47 |
|
48 |
</div><!--end of main--> |
49 |
|
50 |
<div id="sidebar"> |
51 |
|
52 |
</div><!--end of sidebar--> |
53 |
|
54 |
</div><!--end container--> |
55 |
|
56 |
</body>
|
57 |
</html>
|

Creamo la connessione a MySQL. Apriamo connections.php e scriviamo quanto segue:
1 |
|
2 |
<?php
|
3 |
|
4 |
$server="localhost"; |
5 |
$user="tutorial"; |
6 |
$pass="supersecretpassword"; |
7 |
$db="tutorials"; |
8 |
|
9 |
// connect to mysql
|
10 |
|
11 |
mysql_connect($server, $user, $pass) or die("Sorry, can't connect to the mysql."); |
12 |
|
13 |
// select the db
|
14 |
|
15 |
mysql_select_db($db) or die("Sorry, can't select the database."); |
16 |
|
17 |
?>
|
Step 5
Ora è il momento di scrivere il markup della pagina prodotti. Quindi andiamo avanti e scriviamo quanto segue:
1 |
|
2 |
<h1>Product List</h1> |
3 |
<table>
|
4 |
<tr>
|
5 |
<th>Name</th> |
6 |
<th>Description</th> |
7 |
<th>Price</th> |
8 |
<th>Action</th> |
9 |
</tr>
|
10 |
<tr>
|
11 |
<td>Product 1</td> |
12 |
<td>Some random description</td> |
13 |
<td>15 $</th> |
14 |
<td><a href="#">Add to cart</a></td> |
15 |
</tr>
|
16 |
<tr>
|
17 |
<td>Product 2</td> |
18 |
<td>Some random description</td> |
19 |
<td>25 $</th> |
20 |
<td><a href="#">Add to cart</a></td> |
21 |
</tr>
|
22 |
</table>
|
Diamo un'occhiata alla pagina:

Come potete vedere è bruttina. Aggiungiamo un pò di stile con i CSS.
1 |
|
2 |
a {color: #48577D; text-decoration: none;} |
3 |
|
4 |
a:hover {text-decoration: underline;} |
5 |
|
6 |
h1, h2 {margin-bottom: 15px} |
7 |
|
8 |
h1 {font-size: 18px;} |
9 |
h2 {font-size: 16px} |
10 |
#main table { |
11 |
width: 480px; |
12 |
}
|
13 |
|
14 |
#main table th { |
15 |
padding: 10px; |
16 |
background-color: #48577D; |
17 |
color: #fff; |
18 |
text-align: left; |
19 |
}
|
20 |
|
21 |
#main table td { |
22 |
padding: 5px; |
23 |
}
|
24 |
#main table tr { |
25 |
background-color: #d3dcf2; |
26 |
}
|
Okay: diamo un'altra occhiata ora:

Un po' meglio, non credete? Di seguito il codice di style.css completo:
1 |
|
2 |
body { |
3 |
font-family: Verdana; |
4 |
font-size: 12px; |
5 |
color: #444; |
6 |
}
|
7 |
|
8 |
a {color: #48577D; text-decoration: none;} |
9 |
|
10 |
a:hover {text-decoration: underline;} |
11 |
|
12 |
h1, h2 {margin-bottom: 15px} |
13 |
|
14 |
h1 {font-size: 18px;} |
15 |
h2 {font-size: 16px} |
16 |
|
17 |
#container { |
18 |
width: 700px; |
19 |
margin: 150px auto; |
20 |
background-color: #eee; |
21 |
padding:15px; |
22 |
overflow: hidden; |
23 |
}
|
24 |
|
25 |
#main { |
26 |
width: 490px; |
27 |
float: left; |
28 |
}
|
29 |
|
30 |
#main table { |
31 |
width: 480px; |
32 |
}
|
33 |
|
34 |
#main table th { |
35 |
padding: 10px; |
36 |
background-color: #48577D; |
37 |
color: #fff; |
38 |
text-align: left; |
39 |
}
|
40 |
|
41 |
#main table td { |
42 |
padding: 5px; |
43 |
}
|
44 |
|
45 |
#main table tr { |
46 |
background-color: #d3dcf2; |
47 |
}
|
48 |
|
49 |
#sidebar { |
50 |
width: 200px; |
51 |
float: left; |
52 |
}
|
Step 6
Prima di estrarre il prodotto dal database, cerchiamo di rimuovere le ultime due righe dalla nostra tabella (le abbiamo usate solo per vedere come si presenta la nostra tabella). Rimuovere questo:
1 |
|
2 |
<tr>
|
3 |
<td>Product 1</td> |
4 |
<td>Some random description</td> |
5 |
<td>15 $</th> |
6 |
<td><a href="#">Add to cart</a></td> |
7 |
</tr>
|
8 |
<tr>
|
9 |
<td>Product 2</td> |
10 |
<td>Some random description</td> |
11 |
<td>25 $</th> |
12 |
<td><a href="#">Add to cart</a></td> |
13 |
</tr>
|
Grande! Ora, dove erano le righe della tabella, digitare il seguente codice PHP:
1 |
|
2 |
<?php
|
3 |
|
4 |
$sql="SELECT * FROM products ORDER BY name ASC"; |
5 |
$query=mysql_query($sql); |
6 |
|
7 |
while ($row=mysql_fetch_array($query)) { |
8 |
|
9 |
?>
|
10 |
<tr>
|
11 |
<td><?php echo $row['name'] ?></td> |
12 |
<td><?php echo $row['description'] ?></td> |
13 |
<td><?php echo $row['price'] ?>$</td> |
14 |
<td><a href="index.php?page=products&action=add&id=<?php echo $row['id_product'] ?>">Add to cart</a></td> |
15 |
</tr>
|
16 |
<?php
|
17 |
|
18 |
}
|
19 |
|
20 |
?>
|
- Quindi, in primo luogo usiamo SELECT per recuperare i prodotti, quindi facciamo un loop su ogni riga del database e la visualizziamo sulla pagina in una riga della tabella.
- Si può vedere che il link punta alla stessa pagina (quando l'utente fa clic il prodotto viene aggiunto al carrello/sessione). Passiamo solo alcune variabili supplementari come l'id del prodotto.
Se si passa col mouse sopra uno dei collegamenti Aggiungi al carrello, si può vedere, nella parte inferiore della pagina, che viene passato l'id del prodotto.

Step 7
Facciamo in modo che i link funzionino aggiungendo il seguente codice nella parte superiore della nostra pagina:
1 |
|
2 |
<?php
|
3 |
|
4 |
if(isset($_GET['action']) && $_GET['action']=="add"){ |
5 |
|
6 |
$id=intval($_GET['id']); |
7 |
|
8 |
if(isset($_SESSION['cart'][$id])){ |
9 |
|
10 |
$_SESSION['cart'][$id]['quantity']++; |
11 |
|
12 |
}else{ |
13 |
|
14 |
$sql_s="SELECT * FROM products |
15 |
WHERE id_product={$id}"; |
16 |
$query_s=mysql_query($sql_s); |
17 |
if(mysql_num_rows($query_s)!=0){ |
18 |
$row_s=mysql_fetch_array($query_s); |
19 |
|
20 |
$_SESSION['cart'][$row_s['id_product']]=array( |
21 |
"quantity" => 1, |
22 |
"price" => $row_s['price'] |
23 |
);
|
24 |
|
25 |
|
26 |
}else{ |
27 |
|
28 |
$message="This product id it's invalid!"; |
29 |
|
30 |
}
|
31 |
|
32 |
}
|
33 |
|
34 |
}
|
35 |
|
36 |
?>
|
- Se è impostata la variabile GET chiamata action e il suo valore è ADD, eseguiamo il codice.
- Facciamo in modo che l'id passato attraverso la variabile GET sia un numero intero
- Se l'id del prodotto è nella sessione del carrello, dobbiamo solo incrementare la quantità di 1
- Se l'id non è presente nella sessione, abbiamo bisogno di assicurarci che l'id passato attraverso la variabile GET esista nel database. In caso affermativo, dobbiamo prendere il prezzo e creare la sessione. Se così non fosse, abbiamo impostato una variabile denominata messaggio che conterrà il nostro errore.
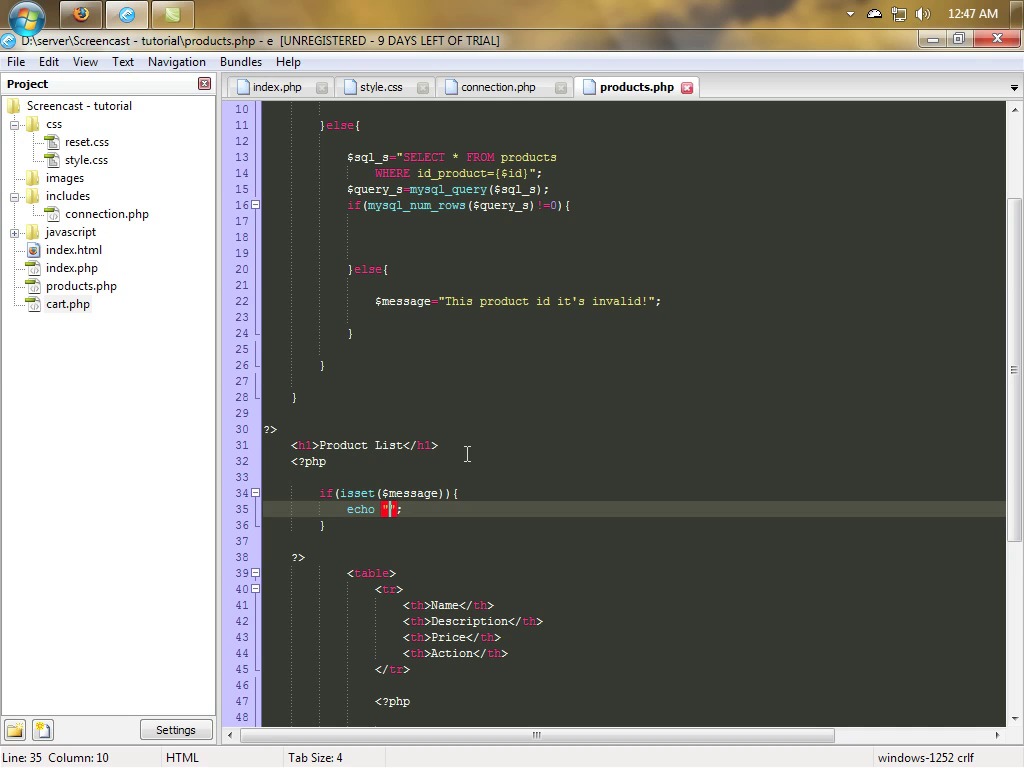
Controlliamo se tale variabile di messaggio è impostata e mostriamola sulla pagina (digitate questo codice sotto il titolo della pagina H1):
1 |
|
2 |
<?php
|
3 |
if(isset($message)){ |
4 |
echo "<h2>$message</h2>"; |
5 |
}
|
6 |
?>
|
Qui si vede la pagina completa products.php.
1 |
|
2 |
<?php
|
3 |
|
4 |
if(isset($_GET['action']) && $_GET['action']=="add"){ |
5 |
|
6 |
$id=intval($_GET['id']); |
7 |
|
8 |
if(isset($_SESSION['cart'][$id])){ |
9 |
|
10 |
$_SESSION['cart'][$id]['quantity']++; |
11 |
|
12 |
}else{ |
13 |
|
14 |
$sql_s="SELECT * FROM products |
15 |
WHERE id_product={$id}"; |
16 |
$query_s=mysql_query($sql_s); |
17 |
if(mysql_num_rows($query_s)!=0){ |
18 |
$row_s=mysql_fetch_array($query_s); |
19 |
|
20 |
$_SESSION['cart'][$row_s['id_product']]=array( |
21 |
"quantity" => 1, |
22 |
"price" => $row_s['price'] |
23 |
);
|
24 |
|
25 |
|
26 |
}else{ |
27 |
|
28 |
$message="This product id it's invalid!"; |
29 |
|
30 |
}
|
31 |
|
32 |
}
|
33 |
|
34 |
}
|
35 |
|
36 |
?>
|
37 |
<h1>Product List</h1> |
38 |
<?php
|
39 |
if(isset($message)){ |
40 |
echo "<h2>$message</h2>"; |
41 |
}
|
42 |
?>
|
43 |
<table>
|
44 |
<tr>
|
45 |
<th>Name</th> |
46 |
<th>Description</th> |
47 |
<th>Price</th> |
48 |
<th>Action</th> |
49 |
</tr>
|
50 |
|
51 |
<?php
|
52 |
|
53 |
$sql="SELECT * FROM products ORDER BY name ASC"; |
54 |
$query=mysql_query($sql); |
55 |
|
56 |
while ($row=mysql_fetch_array($query)) { |
57 |
|
58 |
?>
|
59 |
<tr>
|
60 |
<td><?php echo $row['name'] ?></td> |
61 |
<td><?php echo $row['description'] ?></td> |
62 |
<td><?php echo $row['price'] ?>$</td> |
63 |
<td><a href="index.php?page=products&action=add&id=<?php echo $row['id_product'] ?>">Add to cart</a></td> |
64 |
</tr>
|
65 |
<?php
|
66 |
|
67 |
}
|
68 |
|
69 |
?>
|
70 |
|
71 |
</table>
|
Ecco il messaggio di errore se l'id del prodotto non è valido

Step 8
Torniamo alla index.php e costruiamo la barra laterale. Aggiungete il codice riportato di seguito:
1 |
|
2 |
<h1>Cart</h1> |
3 |
<?php
|
4 |
|
5 |
if(isset($_SESSION['cart'])){ |
6 |
|
7 |
$sql="SELECT * FROM products WHERE id_product IN ("; |
8 |
|
9 |
foreach($_SESSION['cart'] as $id => $value) { |
10 |
$sql.=$id.","; |
11 |
}
|
12 |
|
13 |
$sql=substr($sql, 0, -1).") ORDER BY name ASC"; |
14 |
$query=mysql_query($sql); |
15 |
while($row=mysql_fetch_array($query)){ |
16 |
|
17 |
?>
|
18 |
<p><?php echo $row['name'] ?> x <?php echo $_SESSION['cart'][$row['id_product']]['quantity'] ?></p> |
19 |
<?php
|
20 |
|
21 |
}
|
22 |
?>
|
23 |
<hr /> |
24 |
<a href="index.php?page=cart">Go to cart</a> |
25 |
<?php
|
26 |
|
27 |
}else{ |
28 |
|
29 |
echo "<p>Your Cart is empty. Please add some products.</p>"; |
30 |
|
31 |
}
|
32 |
|
33 |
?>
|
- Prima verifichiamo se il carrello di sessione è impostato. In caso negativo, visualizziamo il messaggio, per avvertire l'utente che il carrello è vuoto.
- Successivamente facciamo una SELECT mysql, ma stiamo selezionando solo i prodotti che sono nella sessione. A tale scopo, utilizziamo la funzione foreach. Quindi facciamo un loop sulla sessione ed aggiungiamo l'id del prodotto alla SELECT. Poi, useremo la funzione substr per rimuovere l'ultima virgola dalla SELECT.
- Alla fine abbiamo l'output dei dati al browser.
Date un'occhiata alle immagini qui sotto:


Poiché l'index.php è un modello per tutti i file, la barra laterale sarà visibile in cart.php anche. Non è cool?!
Step 9
Infine, aprite cart.php e digitate il codice riportato di seguito:
1 |
|
2 |
<h1>View cart</h1> |
3 |
<a href="index.php?page=products">Go back to products page</a> |
4 |
<form method="post" action="index.php?page=cart"> |
5 |
|
6 |
<table>
|
7 |
|
8 |
<tr>
|
9 |
<th>Name</th> |
10 |
<th>Quantity</th> |
11 |
<th>Price</th> |
12 |
<th>Items Price</th> |
13 |
</tr>
|
14 |
|
15 |
<?php
|
16 |
|
17 |
$sql="SELECT * FROM products WHERE id_product IN ("; |
18 |
|
19 |
foreach($_SESSION['cart'] as $id => $value) { |
20 |
$sql.=$id.","; |
21 |
}
|
22 |
|
23 |
$sql=substr($sql, 0, -1).") ORDER BY name ASC"; |
24 |
$query=mysql_query($sql); |
25 |
$totalprice=0; |
26 |
while($row=mysql_fetch_array($query)){ |
27 |
$subtotal=$_SESSION['cart'][$row['id_product']]['quantity']*$row['price']; |
28 |
$totalprice+=$subtotal; |
29 |
?>
|
30 |
<tr>
|
31 |
<td><?php echo $row['name'] ?></td> |
32 |
<td><input type="text" name="quantity[<?php echo $row['id_product'] ?>]" size="5" value="<?php echo $_SESSION['cart'][$row['id_product']]['quantity'] ?>" /></td> |
33 |
<td><?php echo $row['price'] ?>$</td> |
34 |
<td><?php echo $_SESSION['cart'][$row['id_product']]['quantity']*$row['price'] ?>$</td> |
35 |
</tr>
|
36 |
<?php
|
37 |
|
38 |
}
|
39 |
?>
|
40 |
<tr>
|
41 |
<td colspan="4">Total Price: <?php echo $totalprice ?></td> |
42 |
</tr>
|
43 |
|
44 |
</table>
|
45 |
<br /> |
46 |
<button type="submit" name="submit">Update Cart</button> |
47 |
</form>
|
48 |
<br /> |
49 |
<p>To remove an item, set it's quantity to 0. </p> |
Il codice è simile a quella di index.php e products.php, quindi non ho intenzione di spiegare tutto di nuovo. Si dovrebbe notare che invece di visualizzare la quantità in un form, ora viene visualizzato in una casella di input (in modo che possiamo cambiare la quantità). Inoltre la tabella è racchiusa in un tag form. Per ottenere il prezzo totale degli articoli si moltiplica la quantità dell'id prodotto specifico (dalla sessione) con il suo prezzo. Questo viene fatto in ogni ciclo.
Nota: L'input è un array, la chiave è l'id del prodotto e la quantità è il valore della quantità.

Step 10
L'ultimo passo che dobbiamo fare è quello di far funzionare il form. Quindi aggiungiamo questo codice all'inizio della pagina cart.php.
1 |
|
2 |
if(isset($_POST['submit'])){ |
3 |
|
4 |
foreach($_POST['quantity'] as $key => $val) { |
5 |
if($val==0) { |
6 |
unset($_SESSION['cart'][$key]); |
7 |
}else{ |
8 |
$_SESSION['cart'][$key]['quantity']=$val; |
9 |
}
|
10 |
}
|
11 |
|
12 |
}
|
- Prima verifichiamo se il modulo è stato inviato. Se è stato inviato e il valore dell'input era zero, cancelliamo tale sessione.
- Se il valore è qualsiasi altro valore, impostiamo la quantità a quel valore invece.
Ecco il file cart.php completo
1 |
|
2 |
<?php
|
3 |
|
4 |
if(isset($_POST['submit'])){ |
5 |
|
6 |
foreach($_POST['quantity'] as $key => $val) { |
7 |
if($val==0) { |
8 |
unset($_SESSION['cart'][$key]); |
9 |
}else{ |
10 |
$_SESSION['cart'][$key]['quantity']=$val; |
11 |
}
|
12 |
}
|
13 |
|
14 |
}
|
15 |
|
16 |
?>
|
17 |
|
18 |
<h1>View cart</h1> |
19 |
<a href="index.php?page=products">Go back to the products page.</a> |
20 |
<form method="post" action="index.php?page=cart"> |
21 |
|
22 |
<table>
|
23 |
|
24 |
<tr>
|
25 |
<th>Name</th> |
26 |
<th>Quantity</th> |
27 |
<th>Price</th> |
28 |
<th>Items Price</th> |
29 |
</tr>
|
30 |
|
31 |
<?php
|
32 |
|
33 |
$sql="SELECT * FROM products WHERE id_product IN ("; |
34 |
|
35 |
foreach($_SESSION['cart'] as $id => $value) { |
36 |
$sql.=$id.","; |
37 |
}
|
38 |
|
39 |
$sql=substr($sql, 0, -1).") ORDER BY name ASC"; |
40 |
$query=mysql_query($sql); |
41 |
$totalprice=0; |
42 |
while($row=mysql_fetch_array($query)){ |
43 |
$subtotal=$_SESSION['cart'][$row['id_product']]['quantity']*$row['price']; |
44 |
$totalprice+=$subtotal; |
45 |
?>
|
46 |
<tr>
|
47 |
<td><?php echo $row['name'] ?></td> |
48 |
<td><input type="text" name="quantity[<?php echo $row['id_product'] ?>]" size="5" value="<?php echo $_SESSION['cart'][$row['id_product']]['quantity'] ?>" /></td> |
49 |
<td><?php echo $row['price'] ?>$</td> |
50 |
<td><?php echo $_SESSION['cart'][$row['id_product']]['quantity']*$row['price'] ?>$</td> |
51 |
</tr>
|
52 |
<?php
|
53 |
|
54 |
}
|
55 |
?>
|
56 |
<tr>
|
57 |
<td colspan="4">Total Price: <?php echo $totalprice ?></td> |
58 |
</tr>
|
59 |
|
60 |
</table>
|
61 |
<br /> |
62 |
<button type="submit" name="submit">Update Cart</button> |
63 |
</form>
|
64 |
<br /> |
65 |
<p>To remove an item set its quantity to 0. </p> |

Spero che vi sia piaciuto questo tutorial. Se avete domande, assicuratevi di guardare il video tutorial in modo approfondito!
 By
By


