
 Lessons: 12Length: 54 minutes
- Overview
- Transcript
2.1 Starting the Web Server
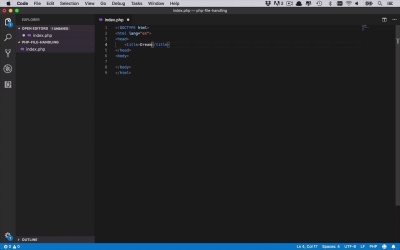
With PHP and your trusty text editor installed and ready to go, it's time to create a basic starting index page that we will work with throughout the course. Once we have our basic page created, let's get our PHP development web server up and running so we can see our site in action.
1.Introduction
1.1Introduction00:40
1.2Prerequisites06:24
2.Getting Started
2.1Starting the Web Server05:26
2.2Creating the Form04:23
2.3Handling the POST04:04
3.Working With Files
3.1File Writing Basics09:48
3.2File Writing Shortcut05:20
3.3Create the Dream Viewer Page02:25
3.4Add the Dream Display Logic04:11
3.5File Reading Basics05:51
3.6File Reading Shortcuts03:31
4.Conclusion
4.1Conclusion01:33
2.1 Starting the Web Server
The first thing that we want to do is be able to create our template for our webpage, or website, or whatever you wanna call it. So that we can actually start to write some code and be able to see how we're gonna perform these operations. So the first thing that I'm going to do is, as you can see here, I'm on my desktop and I've created a folder or a directory called PHP File Handling. You can create this on your desktop or wherever you want, it doesn't really make any difference. And you can call it anything you want. This is just what I have chosen to call it. And then what I wanna do is I wanna open that up in Visual Studio Code. So if I go ahead and open Visual Studio Code, within that directory as you can see right here, I've got no files in here, no code, and it's just waiting for me to get started. So the first thing that I wanna do is I'm gonna go ahead and right click and select New file and I'm gonna create an index.php. Now, once again, you can really call this anything that you want. The traditional way to do this when you're creating a website is to name your first file or your entry point into your website, as Index.something. So if you're creating an HTML site, then it's index.html, if it's PHP, then it's index.php, whatever you really want. But for this course it doesn't really matter, you can call it anything you want, this is just what I'm choosing to do. All right, so now we wanna be able to create a basic HTML template for our site, and then put some PHP code in there so we can see it actually working. Now if you're using a code editor like Visual Studio Code like I am, you're gonna see that you do have some nice features in here. So I can just go ahead and start to type HTML, and Visual Studio Code is gonna give me some Emmet abbreviations is what these are called. But basically what I can do is I can use these as shortcuts to inject a bunch of code, or in this case, HTML, into my file. And if I go down here just a little bit to HTML5, this is going to give me a template for an HTML5 file. So I'm just gonna go ahead and hit Tab. And then you're gonna be able to tab through a bunch of different things to actually put some different text or different values in for certain things in your header or wherever. But in this case, I don't really need any of this stuff, so I'm actually gonna get rid of all of that. And I'm just gonna keep the title, and then make sure you have the head and the body, and really that's all you really need. So the first thing that I'm going to do is I'm gonna change this title. And since the basic concept here is I wanna be able to take some input from the user, I wanna be able to save it to a file, and then I wanna be able to read a file later. So I'm gonna start to set some of this up anyway, and what I'm gonna call this is my Dream Catcher. So you can enter in a person's name and whatever their dreams, or hopes, or aspirations are, and we're gonna go out and save that information through a form. And in our body for now, we're not really gonna get too deep into what we're gonna put in here yet. But just to make sure you have everything working properly, let's just go ahead and stick some PHP in here. So we're going to open and close our PHP tags. And then let's just go ahead and put something out on the screen. So we're gonna say, how about echo "Please enter your dreams!". Something like that. And we want to make this be, let's say an h2. You can really put this in here however you would like, it doesn't really matter. But we just wanna be able to display something out of the screen. So we're gonna have some h2 tags here that are gonna say, please enter your dreams. Let's go ahead and save that. Now what I wanna be able to do is I wanna be able to actually get this up and running and treat it like a web server so I can display these pages or whatever I'm creating right now in a browser. And as I alluded to in the prerequisites lesson, there is a way to do that using just PHP, by spinning up a development server. So the way that we're gonna do that is we're gonna open up a terminal, and we're gonna make sure that we're in that directory. So I'm in my php-file-handing directory, and what I wanna do is I wanna say php -S for server, and I wanna specify localhost and a port number. So let's say 9002, that should be fine. You can basically use any port that's not being used currently on your machine. So if you already have this port in use it will give you an error, and if it's available it will bind to it and start to serve this directory on that port. So let's go ahead and hit Enter. And if it works properly, it'll say the development server has started, it's listening on http://localhost:9002 just like we specified. And it shows the document root, which is the directory where everything is being served from. And then you can quit this with Ctrl+C. So since we have this up and running at localhost 9002, let's go ahead and open up a web browser, and we'll go to localhost 9002. And as you see here, we now have Dream Catcher in our title up on our tab and it says please enter your dreams. So now we're to a point where we've at least got something being served up. We have our basic skeleton of our index.php file, and we are able to inject some PHP on the page. So we know we've got everything up and running. So once we have this going now we can go ahead and start to build out some functionality and start talking about how we handle files using PHP.


