
 Lessons: 14Length: 1.6 hours
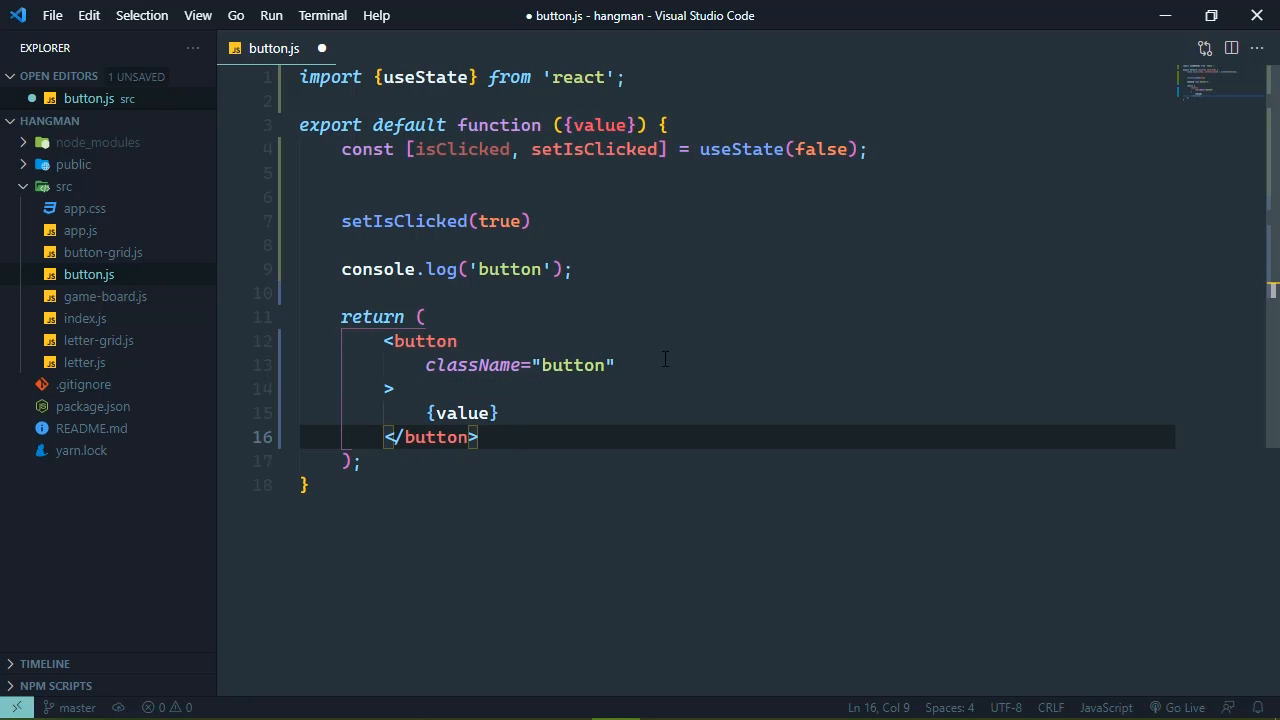
- Overview
- Transcript
4.1 Using State and Events
State is the data that controls the behavior of components. You'll learn how to introduce and change state, handle events, and manipulate style in this lesson.
1.Introduction
1.1Introduction00:53
1.2Creating Projects05:18
2.Getting Started
2.1Touring a New Project07:16
2.2Creating Components07:23
3.Building the Hangman Game
3.1Writing the Application Component07:28
3.2Iterating Over Components08:56
3.3Adding Functionality to Components09:21
3.4Generating More Components04:52
3.5Adding Style to Components08:46
4.Working With Data
4.1Using State and Events10:17
4.2Facilitating Child-to-Parent Communication09:35
4.3Adding Dynamic Content04:53
4.4Handling User Input07:54
5.Conclusion
5.1Conclusion00:56
4.1 Using State and Events
State is the data that controls the behavior of our components. Like for example, our button components, these represent a guess. So when the user clicks on one of these buttons, there are different things that needs to happen. Some of them are at the application level. But as far as the button itself, we want it to hide itself. Because we only want to show the letters that the user has not guessed, that way they know what they have and haven't guessed. So in order to make this work, we need our buttons to keep track of whether or not it has been clicked. So we need to add state to that. And when that state changes, that's going to change the behavior of our buttons, it's going to hide itself. So how do we do that? Well, let's first of all talk about the older versions of React. If we wanted a stateful component, we would always have to use a class. So instead of a function here, we would export a class which we could call simply Button. We would need to extend React.Component, which we would need to import React in order for this to work. We would need the render method, which is essentially the functions that we've been working with, so we could return our button there. And then best case scenario, that's it. For a lot of other things, we would need to add the constructor(props) and then we would always have to call super because that's just one of the things you have to do. If you have a constructor, you have to call super in React. If we wanted to access our value prop, we would have to say this.props. And there's a whole lot of other boilerplate stuff, a lot of other stuff that we would have to write just because we had to, and it just becomes, well, quite frankly, a mess. It's one of those things that I've never really liked about React because there's just code that you have to write just because you have to write it in order for it to work. You can't write just a normal class like you could in some other frameworks. So when React introduced the idea of using a function as a component, they were originally stateless. So they were very simple components. But if you didn't have any state to work with, then they encouraged you to use a function, which makes a whole lot of sense. It's a lot less as far as memory and computation power. However as time has gone on, React and many other frameworks like it have taken a more functional approach. So that now we can use states with a functional component. And it's very clean, especially considering what you would have to write when using a class. And that's one of the reasons why we haven't used a class at all in this course, because, well, there's just a whole lot of stuff that we have to write just because we have to write it in order for it to work. And so, how do we add state to our functional component? Well, we use what's called a hook. It's called useState. This is a function that is going to give us essentially two things. It gives us a variable that we can use inside of our function which is going to essentially be the value so that we could check that value and work with it as we need to. And then it's going to give us a function that we can use to change its value. And this is very important because React isn't going to do anything until the state of a component changes. We'll talk about that here in a moment. So we need to keep track of whether or not the button has been clicked. So we're going to have a variable called isClicked, and we're going to have a function called setiIsClicked. Now, this is, by convention, the function that we will get. We'll just prepend with the word set, just so that we have isClicked and then setIsClicked. We get those by calling useState, and then passing in the default value of that state. So for right now, we have isClicked which is going to be false. If we wanted to change that value, we would call setIsClicked, and then pass in the new value. And that's very important because whenever we call this set function, it is going to notify React that the state has changed for this component. And it's going to essentially call this entire function, so that it can build the appropriate output and then put that into the document. And we can demonstrate that very simply by writing something out to the console. We'll just have a button here. Okay, so the first thing that we want to do is hide the button when it has been clicked. And the way that we can do that is just by modifying the classes that are applied to this button element here. Well, how do we do that? Well, it's very simple. We're going to start with a variable called className, and it is going to have a default value of button because we need that class for our output. Then we are going to check the isClicked variable. If it's true, then we are going to add a class to our className, by just concatenating it. We can call it clicked. Or rather, let's do this, we'll call it guessed, so that then we can use this className variable and use that as our className. And there we go, let's go ahead and let's add that guessed, so that guessed will set the display to none. And that is all ready to go whenever we are ready to actually run this. So then the question becomes, how do we set an event handler for the click on this button? It's very simple. It's going to look very wrong, especially if you've been taught to separate your markup from your JavaScript. And it's going to look like a DOM Level 0 event handler,, but it is simply this, onclick. Now, notice though the casing, we are camel casing this. Remember that this is still JavaScript, it's JavaScript in XML. That means that everything that we are writing is case sensitive. So there is a difference between onClick with an uppercase C, and then onclick with a lowercase c. So we're going to use the uppercase C here. And then we simply just define the function that we want to execute whenever we click on it. We can call it clickHandler. Well, it doesn't matter what we call it because we completely control it. But as far as events are concerned, it's the same pattern, onMouseOver is just camel cased onMouseOut. If we wanted to get into keyboard, we would say onKeyDown or something along those lines. It looks wrong, but when you think about it, this is a very good approach for setting up event listeners because we are no longer separating our markup from our JavaScript. What we are doing is separating our applications based upon functionality, which is components. Components are just small pieces of functionality that build into an application. So as far as our button is concerned, if we need to modify its behavior, it's all right here. We don't have to go into separate files and make whatever changes we need to, everything's just right here ready for us to do. So it makes a whole lot of sense for setting up event handlers this way. So we have this onClick event handler that's going to map to the click event on the DOM. We just need to define this clickHandler function, and we can do this in however that we want to. We can use a function declaration if we want to. And then inside of this function, we will call this setIsClicked function. We will change its value to true. And there we go. So let's go to the browser. Let's do a hard refresh, make sure everything's loaded as it is. And you can see over in the console that our button function, the component, has been called 26 times, which makes sense because there are 26 letters in the alphabet. However, whenever we click on any one of these, we are going to see button appear in the console, just like that. And you can see that the letter O is now no longer there. I'm gonna click on Z, that is gone, we can see that button executes again. So whenever the state of a component changes, React is going to execute this entire function once again. The purpose is to get the appropriate output based upon the change of state. So it sounds rather inefficient but really it's very efficient. I mean yes, there is some overhead involved, but for the most part, this is a very efficient way of updating the DOM. And one of the best thing is we didn't have to write the code to make this happen. Well, we did, but we don't have to write the code to actually update the DOM, that's being done for us. We just write the conditions for updating the DOM, if you will. So there we go. We have added state to our button component. It now knows that it has been clicked, and it is going to hide itself when it is clicked. So the next thing that we need to do is handle the rest of the functionality of when a button is clicked. And that is to determine whether or not the guessed letter is in our secret word. And we will start looking at that in the next lesson.


