
 Lessons: 10Length: 1.1 hours
- Overview
- Transcript
5.1 Conclusion
Let's take a look back at everything we've covered in the course. Thanks for following along, and from all of us here at Envato Tuts+, see you next time!
Related Links
- WordPress Codex: Post Types
- WordPress Function Reference:
register_post_type() - The Template Hierarchy
- WordPress Codex: Taxonomies
- WordPress Function Reference:
register_taxonomy() - WordPress Function Reference:
get_the_term_list() - WordPress Codex: Custom Fields
- WordPress Function Reference:
get_post_meta()
1.Introduction
1.1Introduction01:00
2.WordPress Post Types
2.1Introducing Post Types06:22
2.2Registering a Custom Post Type09:30
2.3Post Type Template Files09:10
3.WordPress Taxonomies
3.1Taxonomies Overview06:31
3.2Registering a Taxonomy08:21
3.3Understanding Taxonomy Terms09:21
3.4Taxonomy Template Files05:26
4.Custom Fields and Post Metadata
4.1Adding and Displaying Custom Fields05:33
5.Conclusion
5.1Conclusion02:48
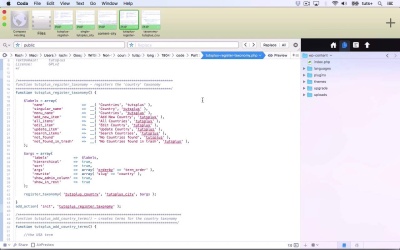
5.1 Conclusion
Hello, and welcome back to this Tuts+ course on Custom Content Types in WordPress. In this course, we looked at the different types of content that you can work with and create in WordPress. And I showed you how to create them using plugins and themes. So we started by looking at post types, and I introduced to you the post types that come with WordPress, out of the box, as it were. But then I also showed you how to register your own post type. So we created a plugin, which registers a new post type called city. And as you can see here in the dashboard, it's here in the admin. So we then went on to looking at how you can display post types in your theme. We then created a template file for it. Now, that template file called another file, an include file, with this get_template_part function here. And so we created that include file by copying the existing default include file and making some edits to it. So having looked at custom post types, we then moved on to looking at taxonomies. And I walked you through the taxonomies that come with WordPress. And then showed you how to register your own taxonomy using the register taxonomy function. So once again, we created a plugin to register our taxonomy. And we called that taxonomy country, or tutsplus_country to make it unique. And we applied it to the tutsplus_city post type that we just registered. I then showed you how you can use code to register some terms for your taxonomy. So in this plugin again, we added the USA and the United Kingdom as terms for that taxonomy. And then we looked at the template files for taxonomies. So once again, using the WordPress theme template hierarchy, we identified which file we would need to create for the archive for that particular taxonomy. And we created a file called taxonomy-tutsplus_country.php, which displays the archive for that particular taxonomy. And after looking at taxonomies, we then went back to looking at custom fields. So I've already shown you how in this particular template file, we displayed a custom field using get_post_meta here. But I also showed you how, let's go into this, how we can edit the city. And we can add a custom field to it, and that's right down the bottom and looks a lot like the classic editor. So here we've got our custom field in the admin. So that's how you work with custom content types in WordPress. There are custom post types, custom taxonomies, and custom fields, and you use them all differently. I hope you found this course useful. Thanks for watching.


