

In this tutorial series, you will learn how to create a simple blogging application using React. We will be creating the application using functional React components. The tutorial covers various aspects like the database, server, routing, and styling.
Getting Started
Our project comprises three parts: a server, a database, and a client. Before we start with the client-side development, we need to set up the server and database.
Building the Database
Let's begin building our database. We are going to use a PSQL shell for the blog application. That means you have to install PSQL on your machine. Once the shell is installed, use the following command to switch into the database:
1 |
psql -U postgres |
Create a database called blog using the command CREATE DATABASE blog, and switch into it using the command \c blog.
This application needs three different tables, so create a schema.sql file and add the following lines of code for creating the tables.
1 |
CREATE TABLE users ( |
2 |
uid SERIAL PRIMARY KEY, |
3 |
username VARCHAR(255) UNIQUE, |
4 |
email VARCHAR(255), |
5 |
email_verified BOOLEAN, |
6 |
date_created DATE, |
7 |
last_login DATE |
8 |
);
|
9 |
|
10 |
CREATE TABLE posts ( |
11 |
pid SERIAL PRIMARY KEY, |
12 |
title VARCHAR(255), |
13 |
body VARCHAR, |
14 |
user_id INT REFERENCES users(uid), |
15 |
author VARCHAR REFERENCES users(username), |
16 |
date_created TIMESTAMP, |
17 |
likes INT DEFAULT 0 |
18 |
);
|
19 |
|
20 |
CREATE TABLE comments ( |
21 |
cid SERIAL PRIMARY KEY, |
22 |
comment VARCHAR(255), |
23 |
author VARCHAR REFERENCES users(username), |
24 |
user_id INT REFERENCES users(uid), |
25 |
post_id INT REFERENCES posts(pid), |
26 |
date_created TIMESTAMP |
27 |
);
|
You can copy and paste these SQL statements in the PSQL Shell for the tables to be created successfully. Remember, every SQL query has to end with a ;. Once the commands are executed, run \dt to see all the tables. You should see the following list:

Setting Up the Server
For the server, we are going to use express. If you do not have express in your system, it can be installed easily using the express-generator package.
1 |
npm install -g express-generator |
express-generator is a very simple tool. Once the installation is done, you can initialize the server project using the express command. There will be many files and folders once the installation is done. You must delete the extras and be left with the main folder. The server directory should have the following structure.
1 |
Server |
2 |
--main |
3 |
----app.js |
4 |
----db.js |
5 |
----schema.sql |
6 |
--node_modules |
7 |
--package-lock.json |
8 |
--package.json |
Next, modify app.js. You can change the port to anything but 3000 (which will be used by the client).
1 |
const express = require('express') |
2 |
const app = express() |
3 |
const port = 5000 |
4 |
|
5 |
app.get('/', (req, res) => { |
6 |
res.send('Hello World!') |
7 |
})
|
8 |
|
9 |
app.listen(port, () => { |
10 |
console.log(`Example app listening on port ${port}`) |
11 |
})
|
Once express is running successfully, we have two other dependencies to be added.
- cors: this is a library widely used for communicating between the express and react applications.
- pg: this library is used by the server to communicate with the database.
Run the below command to install these libraries:
1 |
npm install pg cors |
Next, we need to get the server and the database communicating. Establishing this connection is very simple, and the pg library helps in doing so. In db.js, enter the following lines of code:
1 |
const { Pool } = require('pg') |
2 |
|
3 |
const pool = new Pool({ |
4 |
user: 'postgres', |
5 |
host: 'localhost', |
6 |
database: 'blog', |
7 |
password: 'postgres', |
8 |
post: 5432 |
9 |
})
|
10 |
|
11 |
module.exports = pool |
Remember to enter the same credentials you used while creating and setting up the PSQL shell.
To implement the sign-in functionality, we need to get all users from the database and check if anyone matches with the data entered. To achieve this, we will modify app.js with the following query. Data from the client application will be present in the req object.
1 |
const express = require('express')
|
2 |
const app = express() |
3 |
const port = 5000 |
4 |
var pool = require('./db')
|
5 |
|
6 |
app.get('/', (req, res) => {
|
7 |
res.send('Hello World!')
|
8 |
}) |
9 |
|
10 |
app.get('/api/get/userprofilefromdb', (req, res, next) => {
|
11 |
const email = req.query.email |
12 |
const pwd = req.query.pwd |
13 |
pool.query(`SELECT * FROM users WHERE email=$1 AND pwd = $2`, [ email, pwd ], |
14 |
(q_err, q_res) => {
|
15 |
res.json(q_res?.rows) |
16 |
}) |
17 |
}) |
18 |
|
19 |
app.listen(port, () => {
|
20 |
console.log(`Example app listening on port ${port}`)
|
21 |
}) |
There you go! The server and the database are now ready.
Creating the Client Environment
Our next goal is to create the client environment.
Firstly, we need to install React. Let's call our project my-blog. The most recent version of React needs Node version 14 or greater and NPM version 5.6 or greater. So install Node and NPM before you install React. To install React and create your project directory, run the following command:
1 |
npx create-react-app my-blog |
Under the hood, the React application uses Webpack to run the front-end pipeline. However, you don't have to worry about this—create-react-app handles it all for you. Once the application is successfully created, run the below command to start the app.
1 |
npm start |
That's how simple it is to create and run a React application. Once the application is running, you will be able to access it at https://localhost:3000.
Project Directory
The default project structure of React will have a bunch of folders. We will have to modify this folder structure to suit our new blog application. The folder structure for our blog will appear as below.
1 |
Root |
2 |
-- src |
3 |
---- pages |
4 |
------ landing |
5 |
------ signin |
6 |
------ signup |
7 |
---- app.css |
8 |
---- app.js |
9 |
---- app.test.js |
10 |
---- index.css |
11 |
---- index.js |
Sign-in Page
Create the Sign-in View
Our first goal is to build the sign-in page. The index.js and index.css files will be created in the signin folder. As mentioned previously, we are going to create a functional React component.
To build the sign-in page, we'll use the default form provided by HTML. This form makes things extremely convenient. It has all the JavaScript functions required to validate, enter, and submit form data. React offers many controlled form elements like <input>, <select>, and <textarea>.
The sign-in form has two input fields and a submit button.
The input field will have a value, id, type, and an onChange function.
-
valuelinks the form input to a specific state variable. -
idis a unique identifier to the form input. -
typeidentifies if the input is an email, text, or password. -
onChangeis triggered whenever the user updates the value. With this function, we can update the state variable inked to the input field.
The button field will have a type and an onClick function.
-
typeidentifies the button type. -
onClickis triggered when the user clicks on the button.
1 |
import './index.css'; |
2 |
.... |
3 |
|
4 |
function SignIn() {
|
5 |
.... |
6 |
return ( |
7 |
<div> |
8 |
<form ...> |
9 |
<h2 className="form-signin-heading"> Sign In </h2> |
10 |
|
11 |
<div className="formItem"> |
12 |
<label htmlFor="inputEmail"> Email address</label> |
13 |
<input type="email" id="inputEmail" className="form-control" placeholder="Email address" required autoFocus /> |
14 |
</div> |
15 |
<div className="formItem"> |
16 |
<label htmlFor="inputPassword"> Password</label> |
17 |
<input type="password" id="inputPassword" className="form-control" placeholder="Password" required /> |
18 |
</div> |
19 |
.. |
20 |
<button className="btn btn-lg btn-primary btn-block" type="button"> Sign In </button> |
21 |
{error && <div className='error'>{error}</div>}
|
22 |
</form> |
23 |
</div> |
24 |
); |
25 |
} |
26 |
|
27 |
export default SignIn; |
Styling the Sign-in Page
Next, we need to style our sign-in page. For this, we will create an index.css file in the Sign In folder. The index.css has to be imported in the index.js file. Add the following line in the index.js file.
1 |
import './index.css'; |
1 |
.formItem { |
2 |
padding-bottom: 30px; |
3 |
display: flex; |
4 |
align-items: center; |
5 |
}
|
6 |
|
7 |
.form-signin-heading { |
8 |
margin-bottom: 100px; |
9 |
font-size: 48px; |
10 |
}
|
11 |
|
12 |
.error { |
13 |
color: red; |
14 |
font-weight: 600; |
15 |
margin-top: 30px; |
16 |
}
|
Sign-in Functionality
To implement the sign-in process, you need to handle the input text onChange event and keep the text box values in a state variable. When the user clicks the button, you'll make use of the state variables to read the email address and password text box values. So let's add the onChange event to the input text boxes:
1 |
..
|
2 |
<div className="formItem"> |
3 |
<label htmlFor="inputEmail" className="sr-only"> Email address</label> |
4 |
<input type="email" id="inputEmail" value={email} onChange={handleEmailChange} className="form-control" placeholder="Email address" required autoFocus /> |
5 |
</div> |
6 |
<div className="formItem"> |
7 |
<label htmlFor="inputPassword" className="sr-only"> Password</label> |
8 |
<input type="password" id="inputPassword" value={password} onChange={handlePasswordChange} className="form-control" placeholder="Password" required /> |
9 |
</div> |
10 |
Define the onChange events in the Signin component. We make use of the useState Hook inside the component. The useState hook declares the state variables email and password. This is the new alternative to this.state inside class-based React components.
- To access the state variable, we only need to use
{email}or{password}inside the HTML elements. - To update the value of the state variable, we need to use the
setEmailandsetPasswordfunctions defined throughuseState. - The default values of the state variables can be passed through
useState. In our case, both variables are empty.
1 |
import { useState } from 'react'; |
2 |
....
|
3 |
|
4 |
function SignIn() { |
5 |
....
|
6 |
const [email, setEmail] = useState('') |
7 |
const [password, setPassword] = useState('') |
8 |
|
9 |
const handleEmailChange = (event) => { |
10 |
setEmail(event.target.value) |
11 |
}
|
12 |
|
13 |
const handlePasswordChange = (event) => { |
14 |
setPassword(event.target.value) |
15 |
}
|
16 |
..
|
17 |
}
|
Next, define an onClick method which you'll invoke on button click. This is a simple GET call to be made with the email and password. Once the response is received, we will display an error or redirect the user to the landing page.
1 |
const handleSubmit = () => { |
2 |
var formdata = new FormData(); |
3 |
|
4 |
var requestOptions = { |
5 |
method: 'GET', |
6 |
body: formdata, |
7 |
redirect: 'follow' |
8 |
};
|
9 |
|
10 |
const url = `http://localhost:5000/api/get/userprofilefromdb?email=${email}&pwd=${password}` |
11 |
fetch(url, requestOptions) |
12 |
.then(response => response.text()) |
13 |
.then(result => navigate("/landing")) |
14 |
.catch(error => setError('Something Went Wrong')); |
15 |
}
|
16 |
|
17 |
.
|
18 |
.
|
19 |
.
|
20 |
<button className="btn btn-lg btn-primary btn-block" type="button" onClick={handleSubmit}> Sign In </button> |
App.js
We have successfully built the basic code for our sign-in page. Now, we need to connect the sign-in page with the app, and this is extremely simple to achieve. We will import the SignIn page into our App.js file.
1 |
import './App.css'; |
2 |
import SignIn from './pages/signin'; |
3 |
|
4 |
function App() { |
5 |
return ( |
6 |
<div className="App"> |
7 |
<SignIn /> |
8 |
</div> |
9 |
);
|
10 |
}
|
11 |
|
12 |
export default App; |
Navigating Between Pages
In any React application, you'll need to navigate between pages. That's what a router is for!
So far, we need to achieve the following routes:
- If the user successfully signs in, the app must navigate to the landing page.
- If the user does not have sign-in credentials, the app must load the sign-up page.
- If the user wants to return to the home page, they should be able to navigate to the root page.
For this, we will use react-router-dom. Run the below command to install react-router-dom.
1 |
npm install react-router-dom |
Once react-router-dom is installed successfully, modify the src/index.js code with the required routes.
1 |
import React from 'react'; |
2 |
import ReactDOM from 'react-dom/client'; |
3 |
import './index.css'; |
4 |
import App from './App'; |
5 |
import SignUp from './pages/signup/index' |
6 |
import Landing from './pages/landing/index' |
7 |
import { |
8 |
createBrowserRouter, |
9 |
RouterProvider, |
10 |
} from "react-router-dom"; |
First, import createBrowserRouter and RouterProvider from react-router-dom.
1 |
const router = createBrowserRouter([ |
2 |
{
|
3 |
path: "/", |
4 |
element: <App/>, |
5 |
},
|
6 |
{
|
7 |
path: "/signup", |
8 |
element: <SignUp />, |
9 |
},
|
10 |
{
|
11 |
path: "/landing", |
12 |
element: <Landing />, |
13 |
}
|
14 |
]);
|
Define the required routes using createBrowserRouter. In this blog application, we will have a route for signup and landing.
1 |
const root = ReactDOM.createRoot(document.getElementById('root')); |
2 |
root.render( |
3 |
<React.StrictMode> |
4 |
<RouterProvider router={router} /> |
5 |
</React.StrictMode> |
6 |
);
|
7 |
Finally, add RouterProvider to the app root component.
Next, we'll modify the sign-in page to accommodate routing.
First, import Link and useNavigate from react-router-dom.
1 |
// ...
|
2 |
|
3 |
import { Link } from "react-router-dom"; |
4 |
import { useNavigate } from "react-router-dom"; |
Next, create a handler for the submit button that navigates to the landing page if the user enters the correct email and password. To do this, first create a navigate function with the useNavigate() hook. Then you can call navigate("/landing") to navigate to the landing page.
1 |
function SignIn() { |
2 |
|
3 |
//...
|
4 |
|
5 |
const navigate = useNavigate(); |
6 |
|
7 |
const handleSubmit = () => { |
8 |
var formdata = new FormData(); |
9 |
|
10 |
var requestOptions = { |
11 |
method: 'GET', |
12 |
body: formdata, |
13 |
redirect: 'follow' |
14 |
};
|
15 |
|
16 |
const url = `http://localhost:5000/api/get/userprofilefromdb?email=${email}&pwd=${password}` |
17 |
fetch(url, requestOptions) |
18 |
.then(response => response.text()) |
19 |
.then(result => navigate("/landing")) |
20 |
.catch(error => setError('Something Went Wrong')); |
21 |
}
|
Finally, enclose the Sign Up button with <Link to={`signup`}><button> Sign Up </button></Link>. Remember, the `signup` route has to be defined inside the RouterProvider.
1 |
// ... |
2 |
|
3 |
return ( |
4 |
<div> |
5 |
<form onSubmit={handleSubmit}>
|
6 |
// ... |
7 |
<Link to={`signup`}><button className="btn btn-lg btn-primary btn-block" type="button"> Sign Up </button></Link>
|
8 |
// ... |
9 |
</form> |
10 |
</div> |
11 |
); |
12 |
} |
13 |
|
14 |
export default SignIn; |
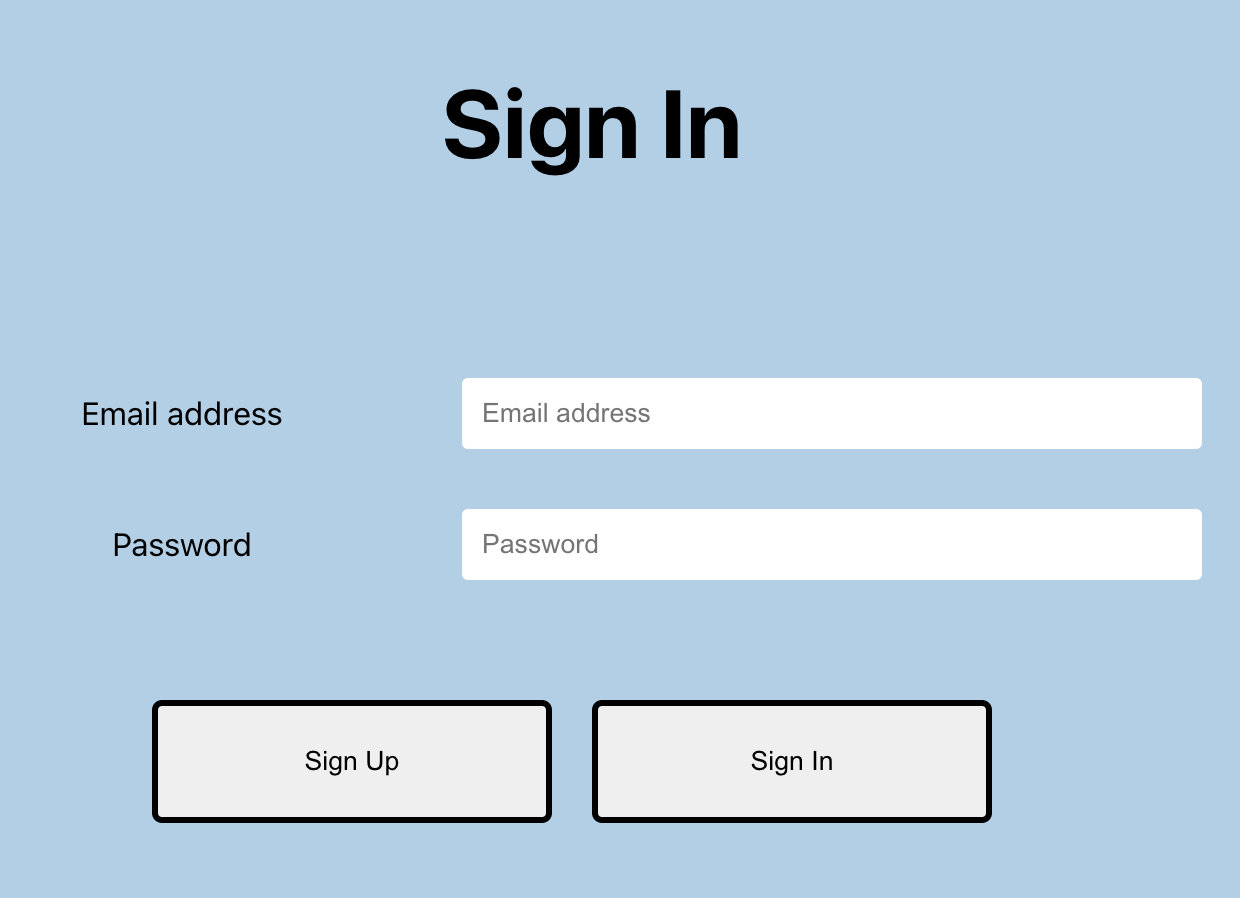
Now, the sign-in page will appear as below:
Implementing user signup is similar to how you implemented sign-in. I'll leave the user signup implementation as an exercise for now, but I'll post it in the next part of this tutorial series.
You can see the completed project code in the GitHub repo.
Demo
We have created this application in StackBlitz for your quick access. Of course, don't try to copy the sign-up code before giving it a try yourself.
Wrapping It Up
In this part of the tutorial series, you created a database, built a simple server, and implemented the sign-in screen on the client-side. You also saw how to use react-router-dom to implement routing in React. In the next part of this tutorial, you'll see how to implement the sign-up portion and the add post page.
 By
By


