


DNS Hosting at Digital Ocean
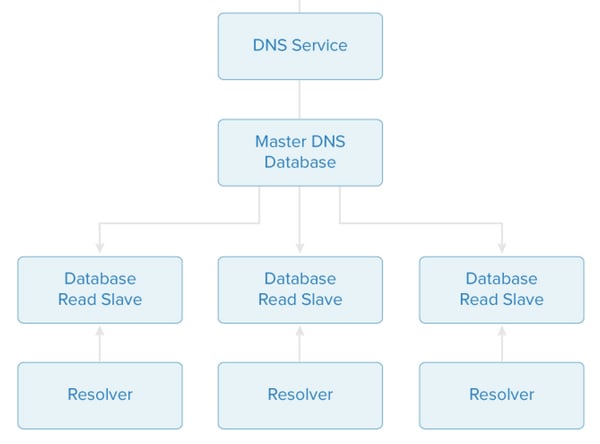
In November 2014, Digital Ocean announced its newly upgraded DNS hosting service. In addition to being fast and reliable, users have experienced near instantaneous updates to DNS records. Any developer or system administrator can appreciate the advantages of this: no more waiting for IP address updates during system migrations. In this tutorial, we're going to expand the functionality of the console application we built last time to include management of Digital Ocean's DNS service.

Again, you can download the free console application from the Tuts+ Github repository. I've posted a detailed installation guide for the console application on my website. You can also explore my generic installation guide for Digital Ocean apps.
While you can use the Digital Ocean web console to manage your DNS records, you may find it advantageous to programmatically manage them via the API.
Documentation for Digital Ocean's DNS API services is located across two main areas:
We'll focus first on configuring your domains and then on adding the individual DNS records.
Point Your Name Services to Digital Ocean
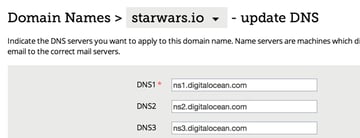
Before you can activate Digital Ocean's own DNS services, you need to transfer your domain nameservers to the Digital Ocean nameservers:
- ns1.digitalocean.com
- ns2.digitalocean.com
- ns3.digitalocean.com
I'm going to add my StarWars.io domain for this tutorial demonstration. Here's my name server change at my domain registrar:

You may find How to Point to DigitalOcean Nameservers From Common Domain Registrars helpful as well.
Using the Digital Ocean Website to Manage DNS
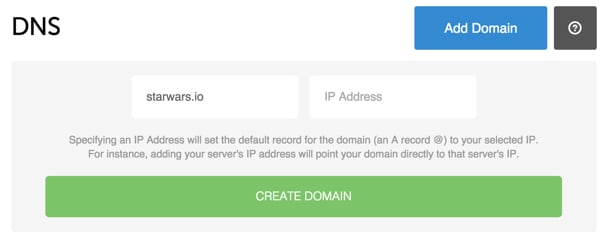
First, let's add a domain to Digital Ocean's DNS through its web user interface. Along the left navigation menu, click on DNS:

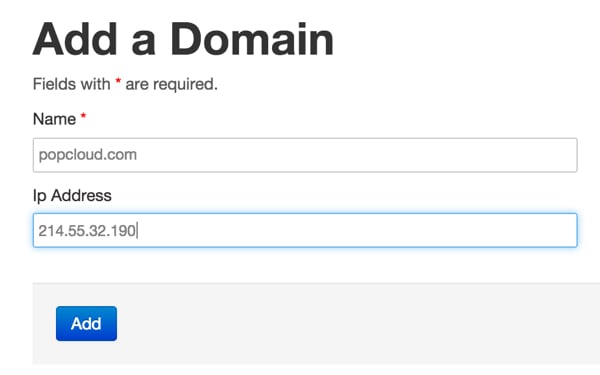
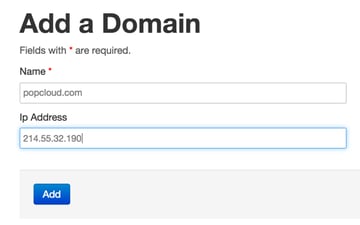
Click Add Domain:

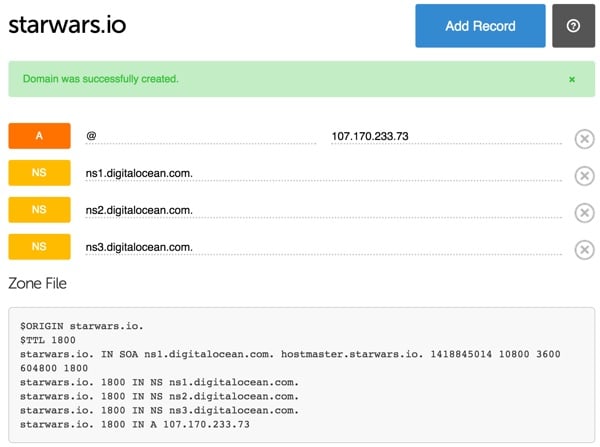
Here's how Digital Ocean displays your DNS record. It's nice that it shows you the generated zone file below:

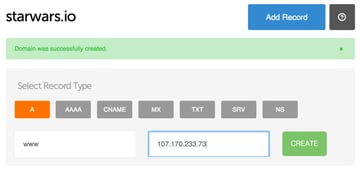
Next, we'll add a domain A record for www.starwars.io:

Now, let's explore the API, beginning by downloading some of the domains and domain records we just created.
Synchronize Your DNS Records
First, let's download the list of our domains using the API. In our console application, click Domains in the navigation bar and click Sync in the right-hand menu.
The DomainController code looks like this:
1 |
public function actionSync() { |
2 |
$domain = new Domain(); |
3 |
$domain->sync(); |
4 |
$this->redirect('/domain/admin'); |
5 |
}
|
The Domain model then calls our Ocean component functions and adds each domain found to our local database:
1 |
public function sync() { |
2 |
$ocean = new Ocean(); |
3 |
$domains = $ocean->getDomains(); |
4 |
foreach ($domains as $d) { |
5 |
$domain_id = $this->add($d); |
6 |
}
|
7 |
}
|
Here's the API code from the Ocean component to retrieve the domain list:
1 |
public function getDomains() { |
2 |
// return the action api
|
3 |
$action = $this->digitalOcean->domain(); |
4 |
// return a collection of Action entity
|
5 |
$actions = $action->getAll(); |
6 |
return $actions; |
7 |
}
|
Here's the Domain model Add method:
1 |
public function add($domain) { |
2 |
$d = Domain::model()->findByAttributes(array('name'=>$domain->name)); |
3 |
if (empty($d)) { |
4 |
$d = new Domain; |
5 |
}
|
6 |
$d->name = $domain->name; |
7 |
$d->ttl = $domain->ttl; |
8 |
$d->zone = $domain->zoneFile; |
9 |
$d->active =1; |
10 |
$d->created_at = $d->created_at; |
11 |
$d->modified_at =new CDbExpression('NOW()'); |
12 |
$d->save(); |
13 |
return $d->id; |
14 |
}
|
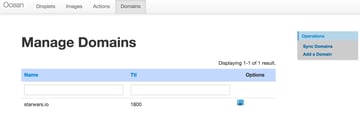
You should see something like this after it completes:

Click on the manage icon in the starwars row and you'll see something like this:


Then, let's sync the domain records for starwars.io. Click Sync Domain Records—this will call the SyncRecords action in DomainController:
1 |
public function actionSyncrecords($id) { |
2 |
$dr = new DomainRecord(); |
3 |
$dr->sync($id); |
4 |
$this->redirect('/domain/view/'.$id); |
5 |
}
|
The DomainRecord model sync method looks like this. It makes a request for the domain name's records and adds each to the DomainRecord table in our local database:
1 |
public function sync($id) { |
2 |
// lookup domain
|
3 |
$d = Domain::model()->findByPk($id); |
4 |
$ocean = new Ocean(); |
5 |
$records = $ocean->getDomainRecords($d->name); |
6 |
foreach ($records as $r) { |
7 |
$record_id = $this->add($id,$r); |
8 |
}
|
9 |
}
|
Here's the Ocean component getDomainRecords method:
1 |
public function getDomainRecords($name) { |
2 |
$action = $this->digitalOcean->domainRecord(); |
3 |
$actions = $action->getAll($name); |
4 |
return $actions; |
5 |
}
|
The DomainRecord add method is a bit more detailed:
1 |
public function add($domain_id,$record) { |
2 |
$dr = DomainRecord::model()->findByAttributes(array('record_id'=>$record->id)); |
3 |
if (empty($dr)) { |
4 |
$dr = new DomainRecord; |
5 |
}
|
6 |
$dr->domain_id = $domain_id; |
7 |
$dr->record_id = $record->id; |
8 |
$dr->record_name = $record->name; |
9 |
$dr->record_type = $record->type; |
10 |
$dr->record_data = $record->data; |
11 |
if (isset($record->priority)) |
12 |
$dr->priority = $record->priority; |
13 |
else
|
14 |
$dr->priority = null; |
15 |
if (isset($record->port)) |
16 |
$dr->port = $record->port; |
17 |
else
|
18 |
$dr->port = null; |
19 |
if (isset($record->weight)) |
20 |
$dr->weight = $record->weight; |
21 |
else
|
22 |
$dr->weight = null; |
23 |
|
24 |
$dr->active =1; |
25 |
$dr->created_at =new CDbExpression('NOW()'); |
26 |
$dr->modified_at =new CDbExpression('NOW()'); |
27 |
$dr->save(); |
28 |
return $dr->id; |
29 |
}
|
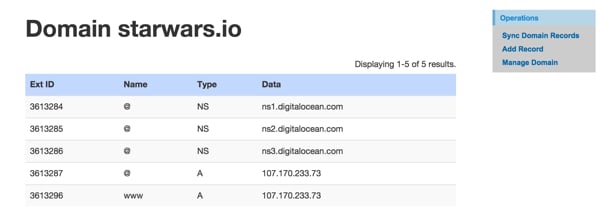
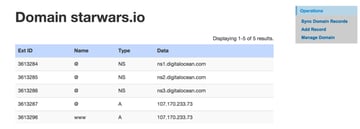
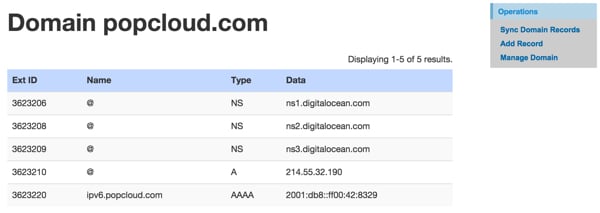
Here's what it will look like after the domain records sync:
Adding Domains From Our Console
You can also add Domains and Domain Records from our console manually.
Here's the code in the Domain model that invokes the API request to add the domain:
1 |
public function remote_add() { |
2 |
$ocean = new Ocean(); |
3 |
$domain = $ocean->createDomain($this->name, $this->ip_address); |
4 |
$this->save(); |
5 |
return true; |
6 |
}
|
Here's the Ocean component addDomain method:
1 |
public function createDomain($name,$ip_address) { |
2 |
$action = $this->digitalOcean->domain(); |
3 |
$create = $action->create($name,$ip_address); |
4 |
return $create; |
5 |
}
|
Then, sync the domain records and add your own:
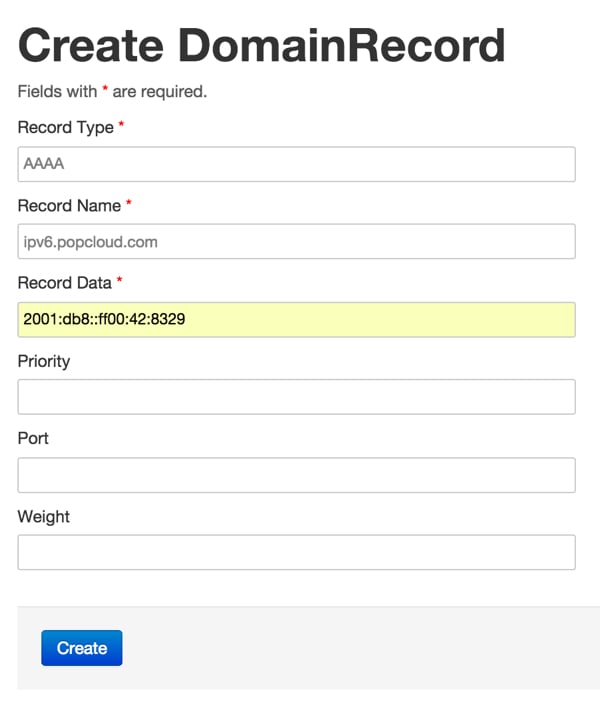

Here's the DomainRecord model remote_add method:
1 |
public function remote_add($id) { |
2 |
$d = Domain::model()->findByPk($id); |
3 |
$ocean = new Ocean(); |
4 |
$record = $ocean->createDomainRecord($d->name,$this->record_type,$this->record_name,$this->record_data,$this->priority,$this->port,$this->weight); |
5 |
$this->domain_id = $id; |
6 |
$this->record_id = $record->id; |
7 |
$this->active =1; |
8 |
$this->created_at =new CDbExpression('NOW()'); |
9 |
$this->modified_at =new CDbExpression('NOW()'); |
10 |
$this->save(); |
11 |
return true; |
12 |
}
|
Here's the Ocean component createDomainRecord method:
1 |
public function createDomainRecord($domain_name,$type,$name,$data,$priority,$port,$weight) { |
2 |
$domainRecord = $this->digitalOcean->domainRecord(); |
3 |
if ($priority=='') $priority=null; |
4 |
if ($port=='') $port=null; |
5 |
if ($weight=='') $weight=null; |
6 |
// return the created DomainRecord entity of the domain 'bar.dk'
|
7 |
$created = $domainRecord->create($domain_name,$type, $name, $data,$priority,$port,$weight); |
8 |
return $created; |
9 |
}
|
You should see something like this in our console:

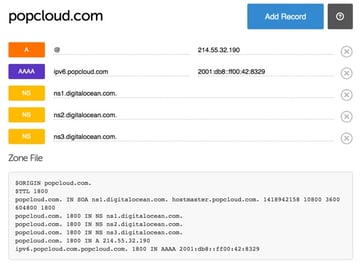
Here's what Digital Ocean's web console will show—notice how our local view and the remote view are now identical:

As you may have noticed, this code lacks robust error checking, synchronization, update, delete, and other bells and whistles. I leave that to you to extend as you wish.
I hope you've found this exploration of the Digital Ocean DNS API to be helpful.
Please feel free to post your questions and comments below. You can also reach me on Twitter @reifman or email me directly. Follow my Tuts+ instructor page to see future articles on related topics.
Related Links
 By
By


